
I have about ten thousand PowerPoints stored, across various different storage devices dotted around my desk, bag and school network with varying amounts of best practice for students embedded across them. For years I diligently colour coded the model paragraphs, annotated them and talked students through them but I never fully bought into them. For me, they were a thing to be done because that’s what we have to do. I had a visualiser but it became buried under a pile of stuff and the workspace in front of it ended up housing spare pens before it was eventually unplugged and pushed into a corner completely. Little did I realise that I was burying one of the most powerful classroom innovations of the past 20 years.
I saw various posts start to pop up periodically on Twitter where someone would share a picture of “their exercise book” and I always chuckled to myself about why a teacher would need to complete the work they were expecting the students to complete. The notions only really had a small grip on my conscious thought before skittering away consigned to the “things I chuckle at on Twitter” corner of my subconscious.
When we got a batch of new visualisers delivered to the department I forced myself to engage with it properly and set about systematically addressing why I hadn’t used it previously as well as seeking out research and best practices around their use currently.
Here are some of my top tips for making effective use of a visualiser in your classroom.
Positioning is Key
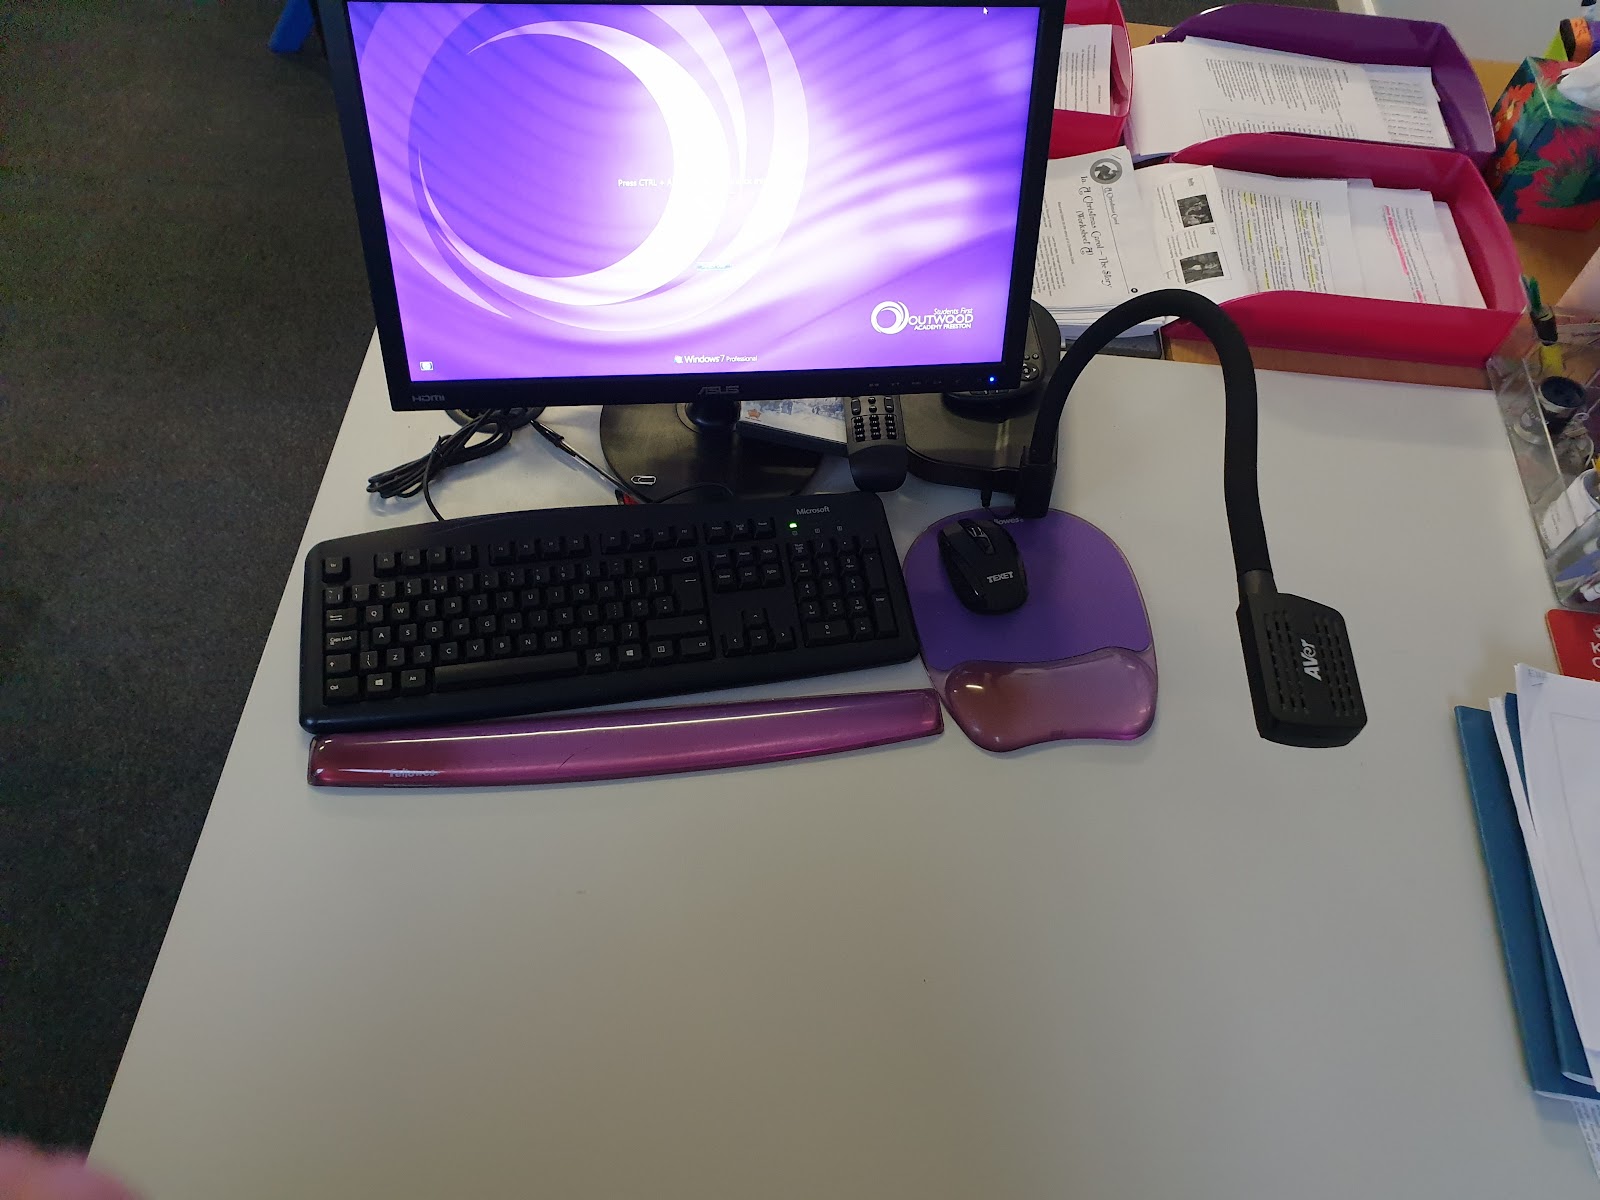
Whenever I hear someone suggest that a visualiser has not been effective for them the first thing I do is check out where it is. If your visualiser is somewhere like this one, you are going to struggle no matter what you try to do with it.

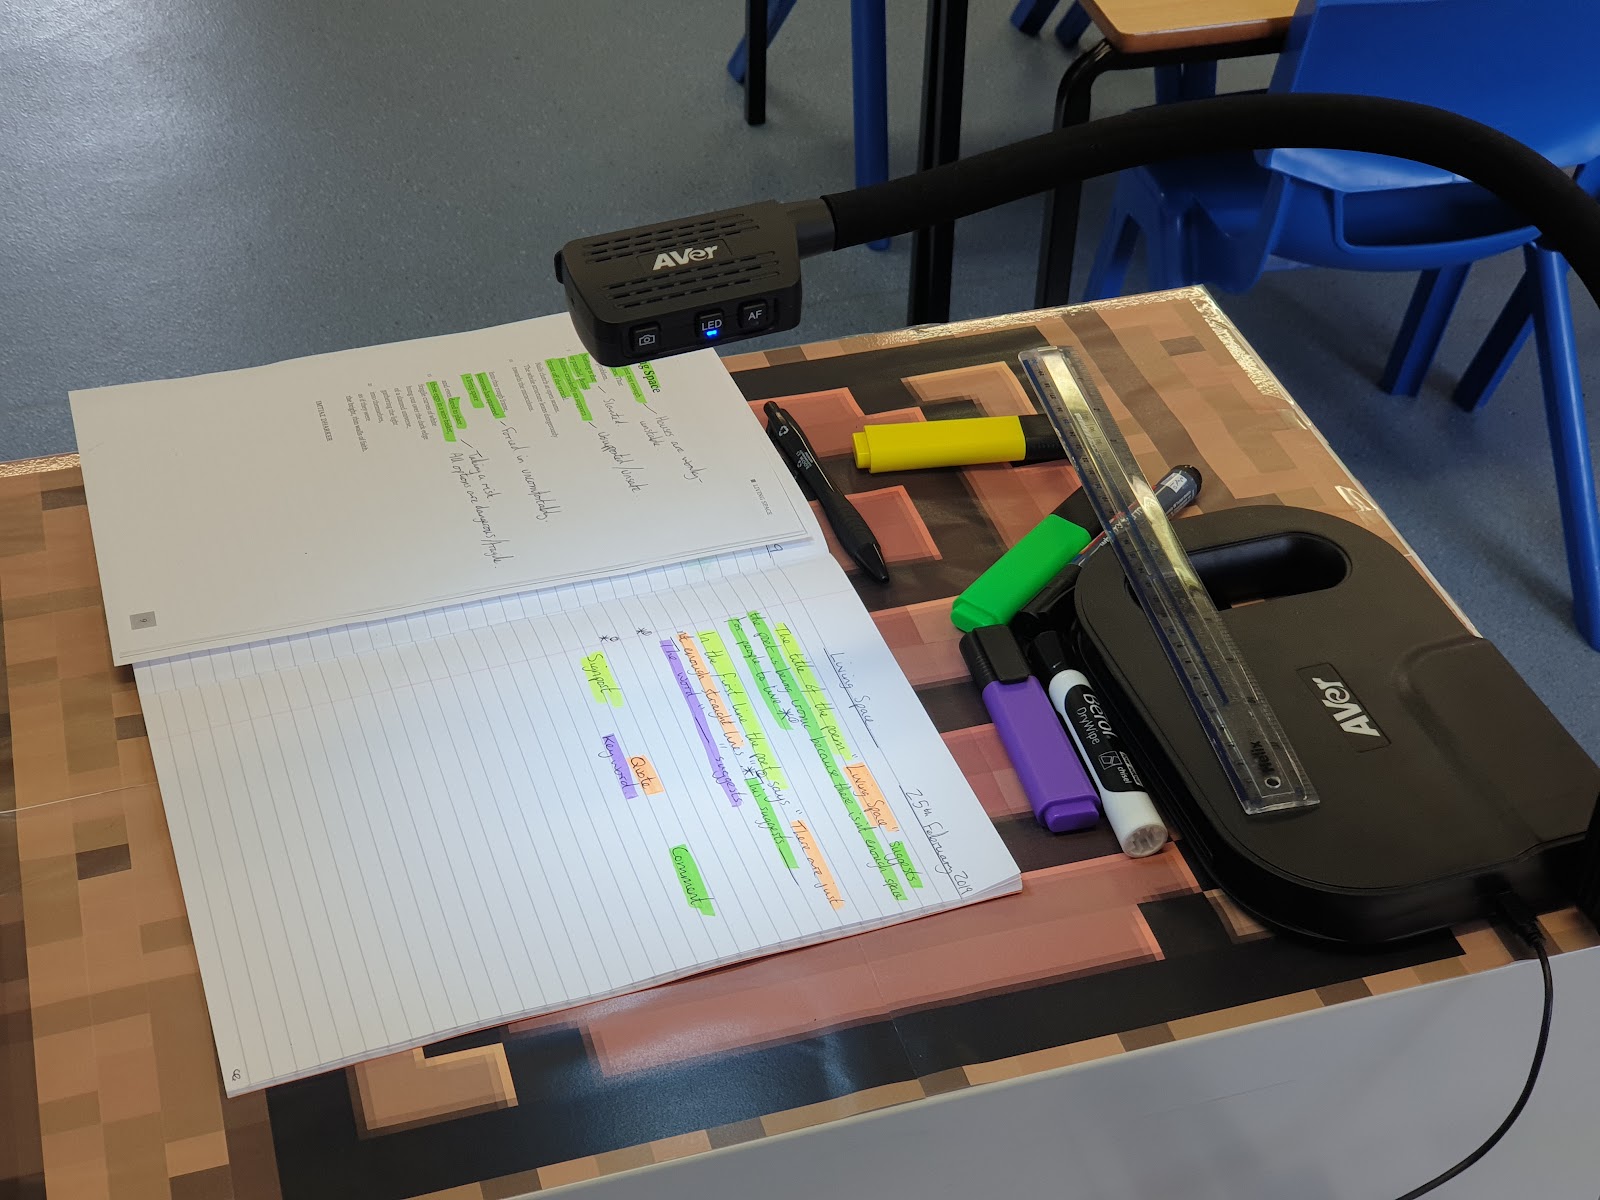
This one is much better but still not ideal for my teaching style. A clear workspace gives the teacher ample room to position whatever they like under the visualiser and adjust it for optimal framing. They still have to sit down in order to use it which isn’t ideal but by shifting it onto their desk, and keeping a clear workspace, they are now using it whilst facing the group. This was by far the most common location for visualisers when I surveyed my own school and ran a quick poll on Twitter with 85% of teachers positioning their visualiser in this way.
Mine sits on top of a filing cabinet to one side of my board like a podium. I can stand up to use it, face the group and interact with my board without moving from that spot and it has transformed my teaching.

A number of colleagues followed this guidance and made use of other furniture they had in their rooms but still applying the principles of standing, at the front and within arms length of their board and reported similar positive impact on their practice. If you can get your visualiser up off your desk so you can use it in the location you usually deliver instructions from then I highly recommend you do it.
Modelling
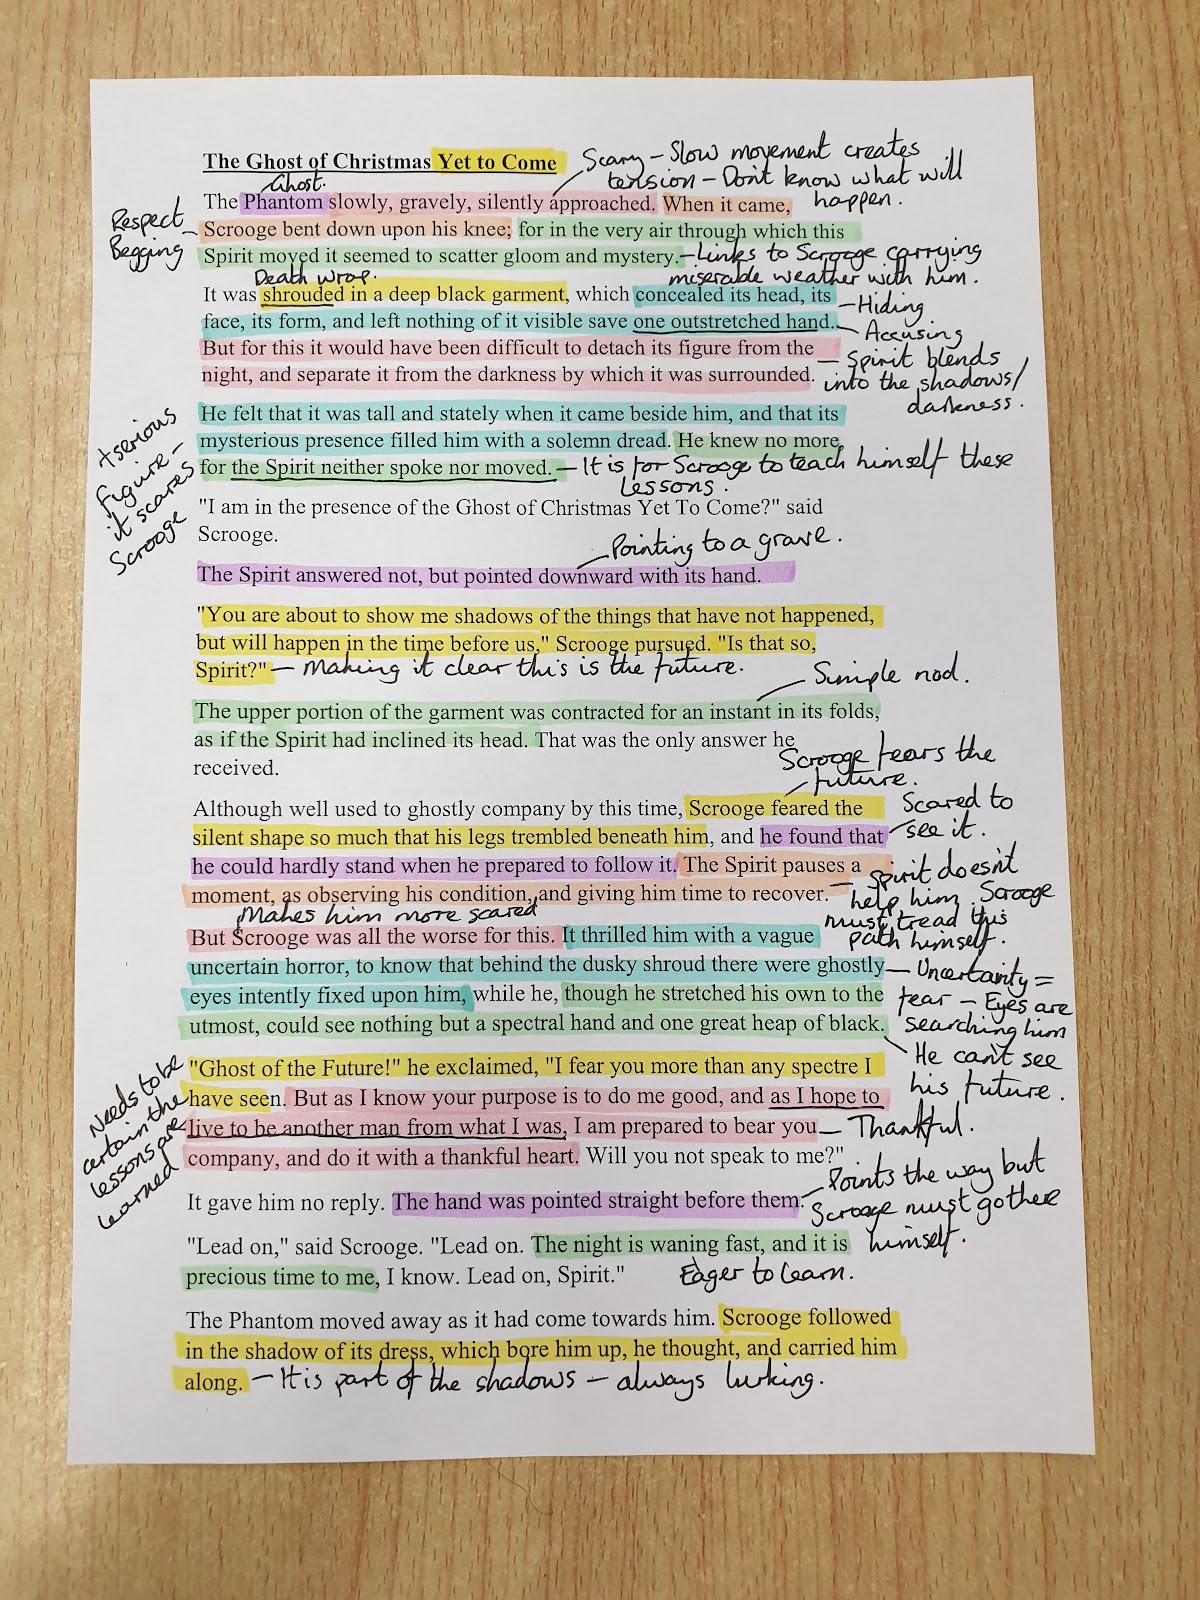
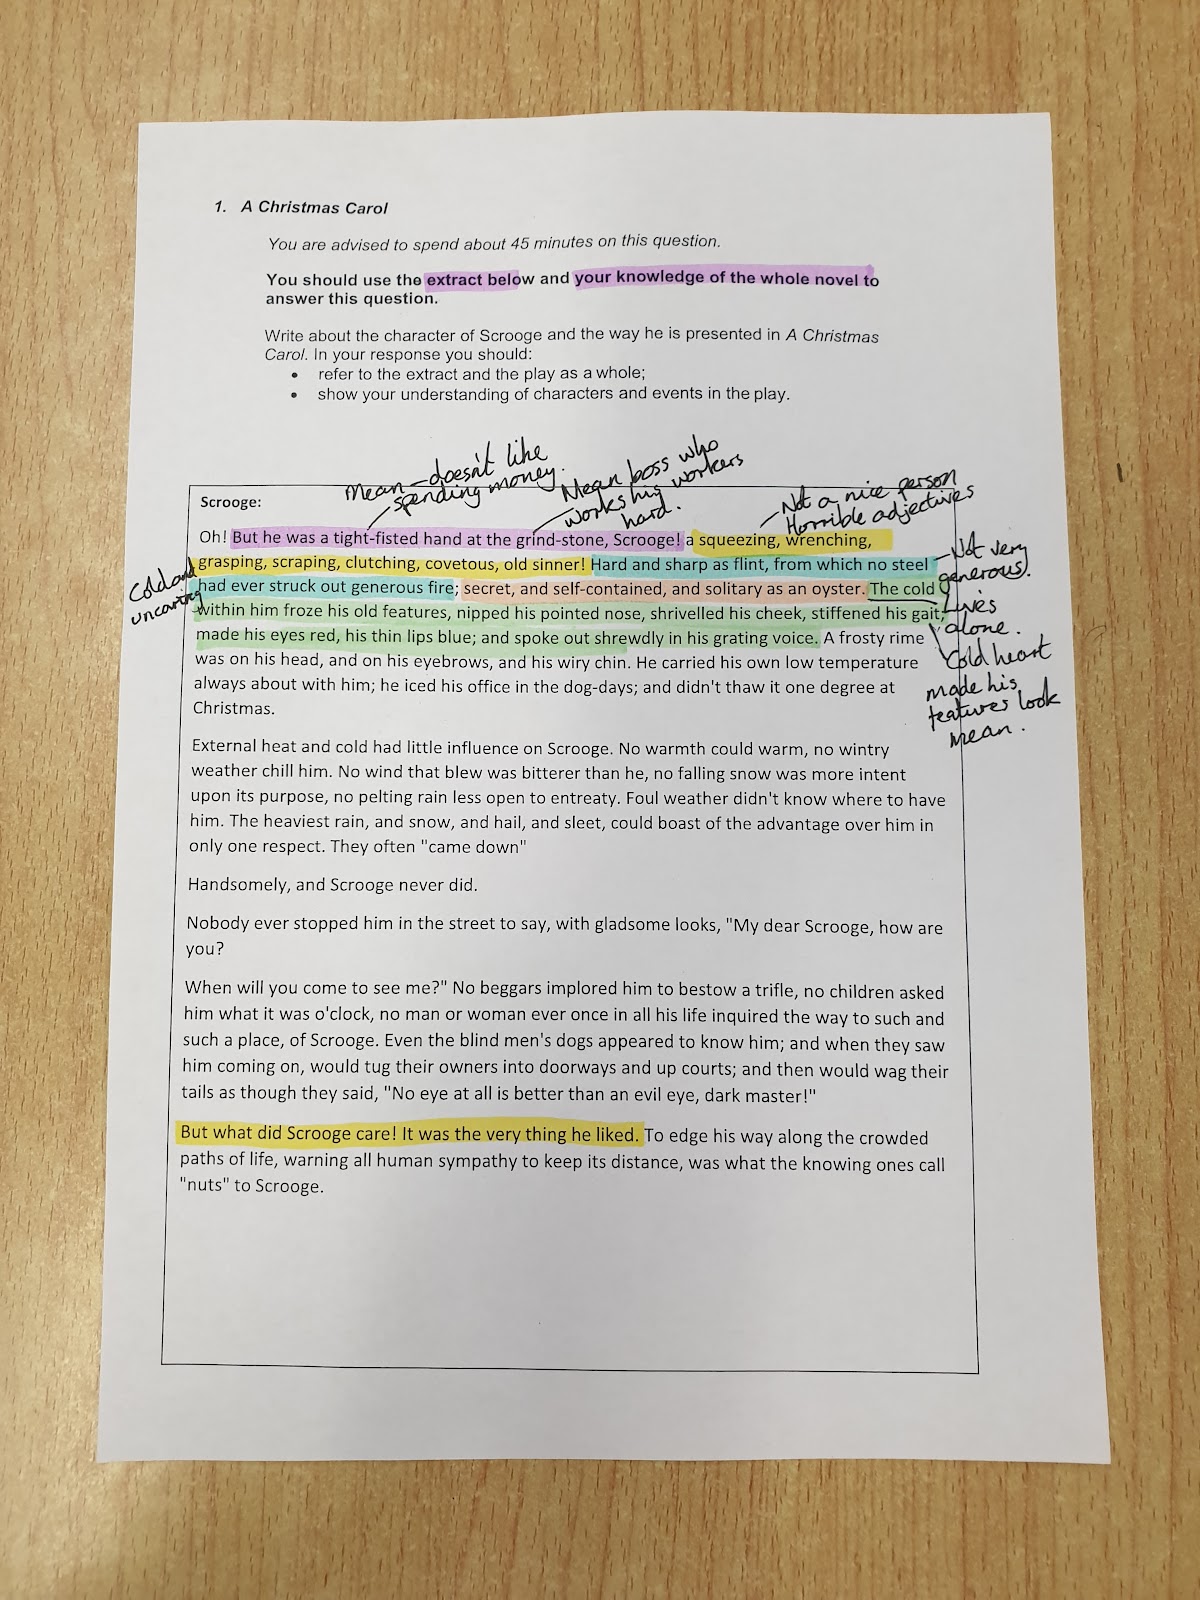
Probably 90% of what I do with my visualiser revolves around live modelling. I model everything from how to annotate a poem or extract to how I would plan a story section and start writing it. I have even been known to actively model how I want students to stick a sheet into their books but let’s not go there right now. However (and this is a big however) I very rarely write my own words when I am modelling. Through carefully guided questioning (see TOM SHERRINGTON for some great guidance), I can tease the model I want out of the class but make them feel as though they have active ownership of it. Of course, I know what I want the writing to say before we start and I know the success criteria for the task and how to best achieve them. I might even partially script a response that I am working towards with the students. But I always let them think they have ownership of what I am writing. They mirror my modelling in their books making their own adaptations as we go and nobody gets left behind since we don’t move on until everyone understands how we constructed the model.
The use of mini whiteboards here has been the greatest revelation for me about this stage in the modelling process. For example, I have students draft an annotation sentence for a phrase in a poem on their boards, then agree a best sentence as a pair and sometimes even a best attempt as a table of 4. When we collect feedback as a whole group we are then looking for common best practice to create a model under the visualiser that we can then all commit to our books (me included) and ensure that everyone understands why it succeeds.
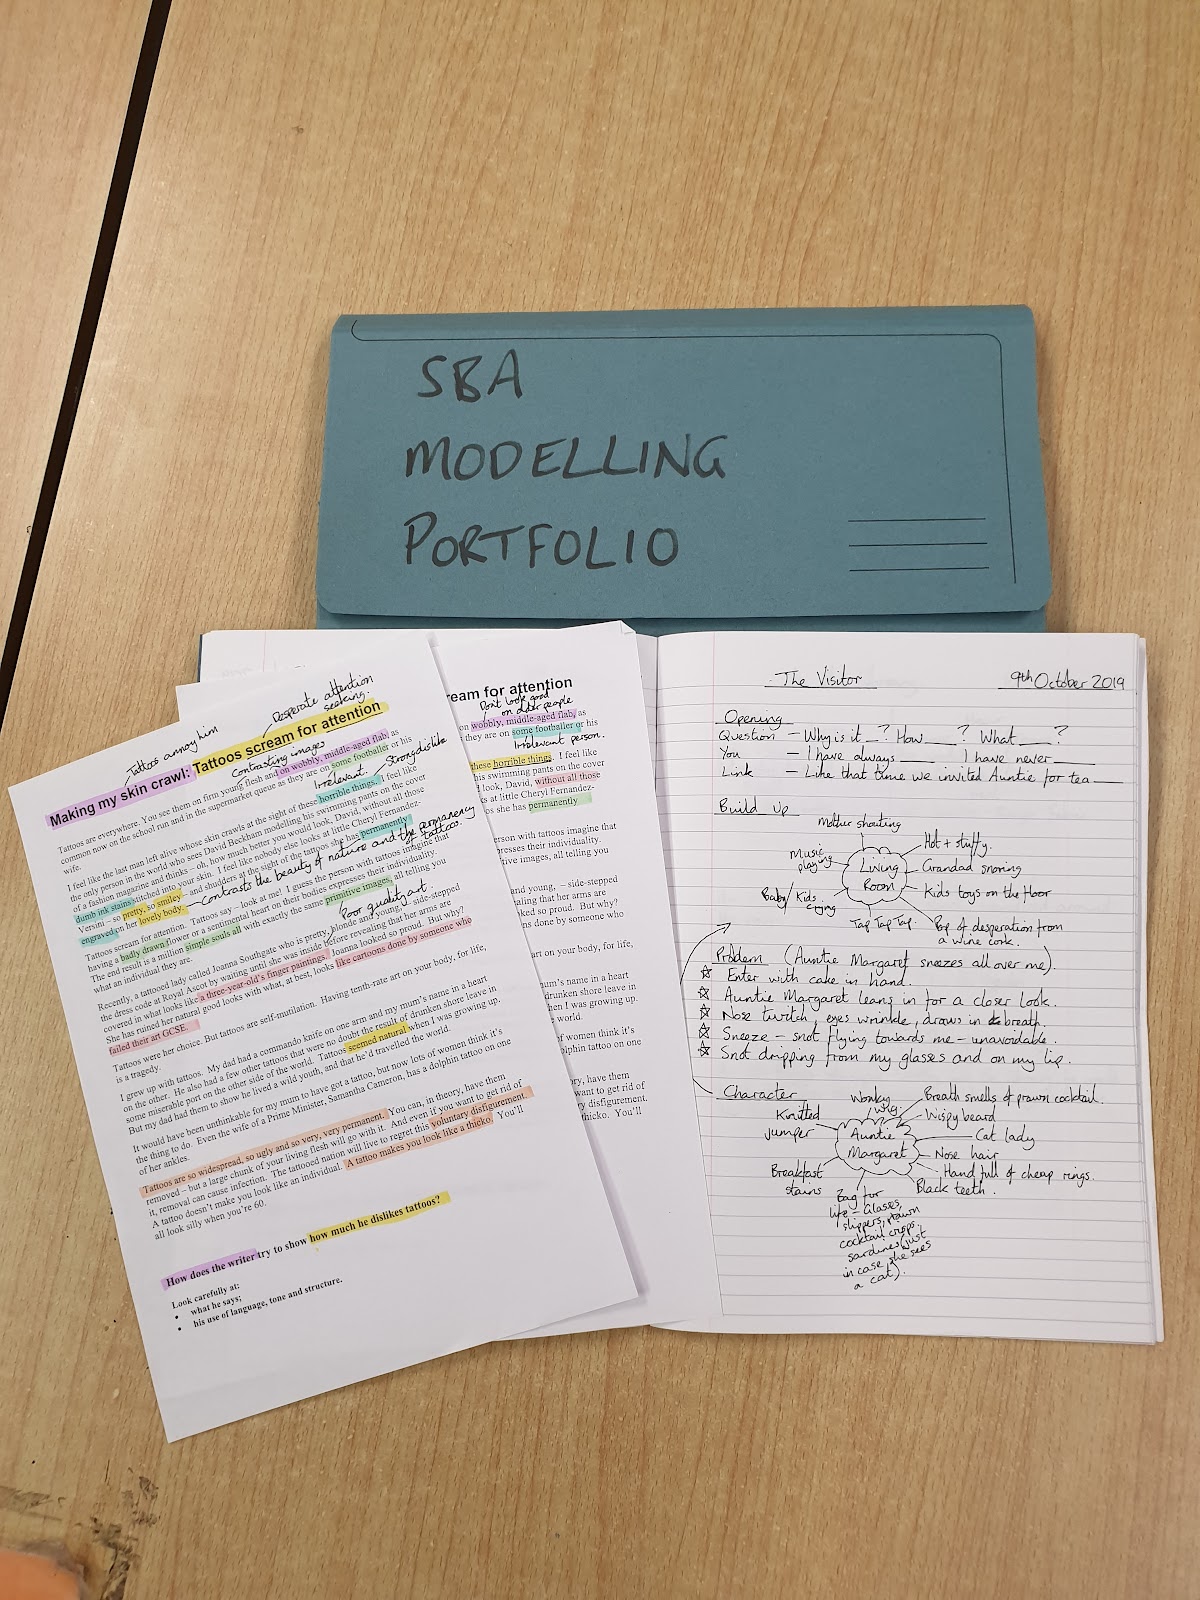
I keep everything in a “Modelling Portfolio” (the irony of which is entirely lost on my students of course).
Scaffolding
By modelling in the way outlined above, I can provide instant, adaptive scaffolding support to students as we progress and since I am constantly taking feedback on their levels of understanding I can judge when it is appropriate to start stripping away the support (explained brilliantly in Adam Boxer’s blog here). Now, of course, I can plan for this using evidence from my marking to inform the next steps of learning. But I have found the process to be way more powerful when adapting live in the lesson and judging the point at which scaffolding is appropriate to remove.
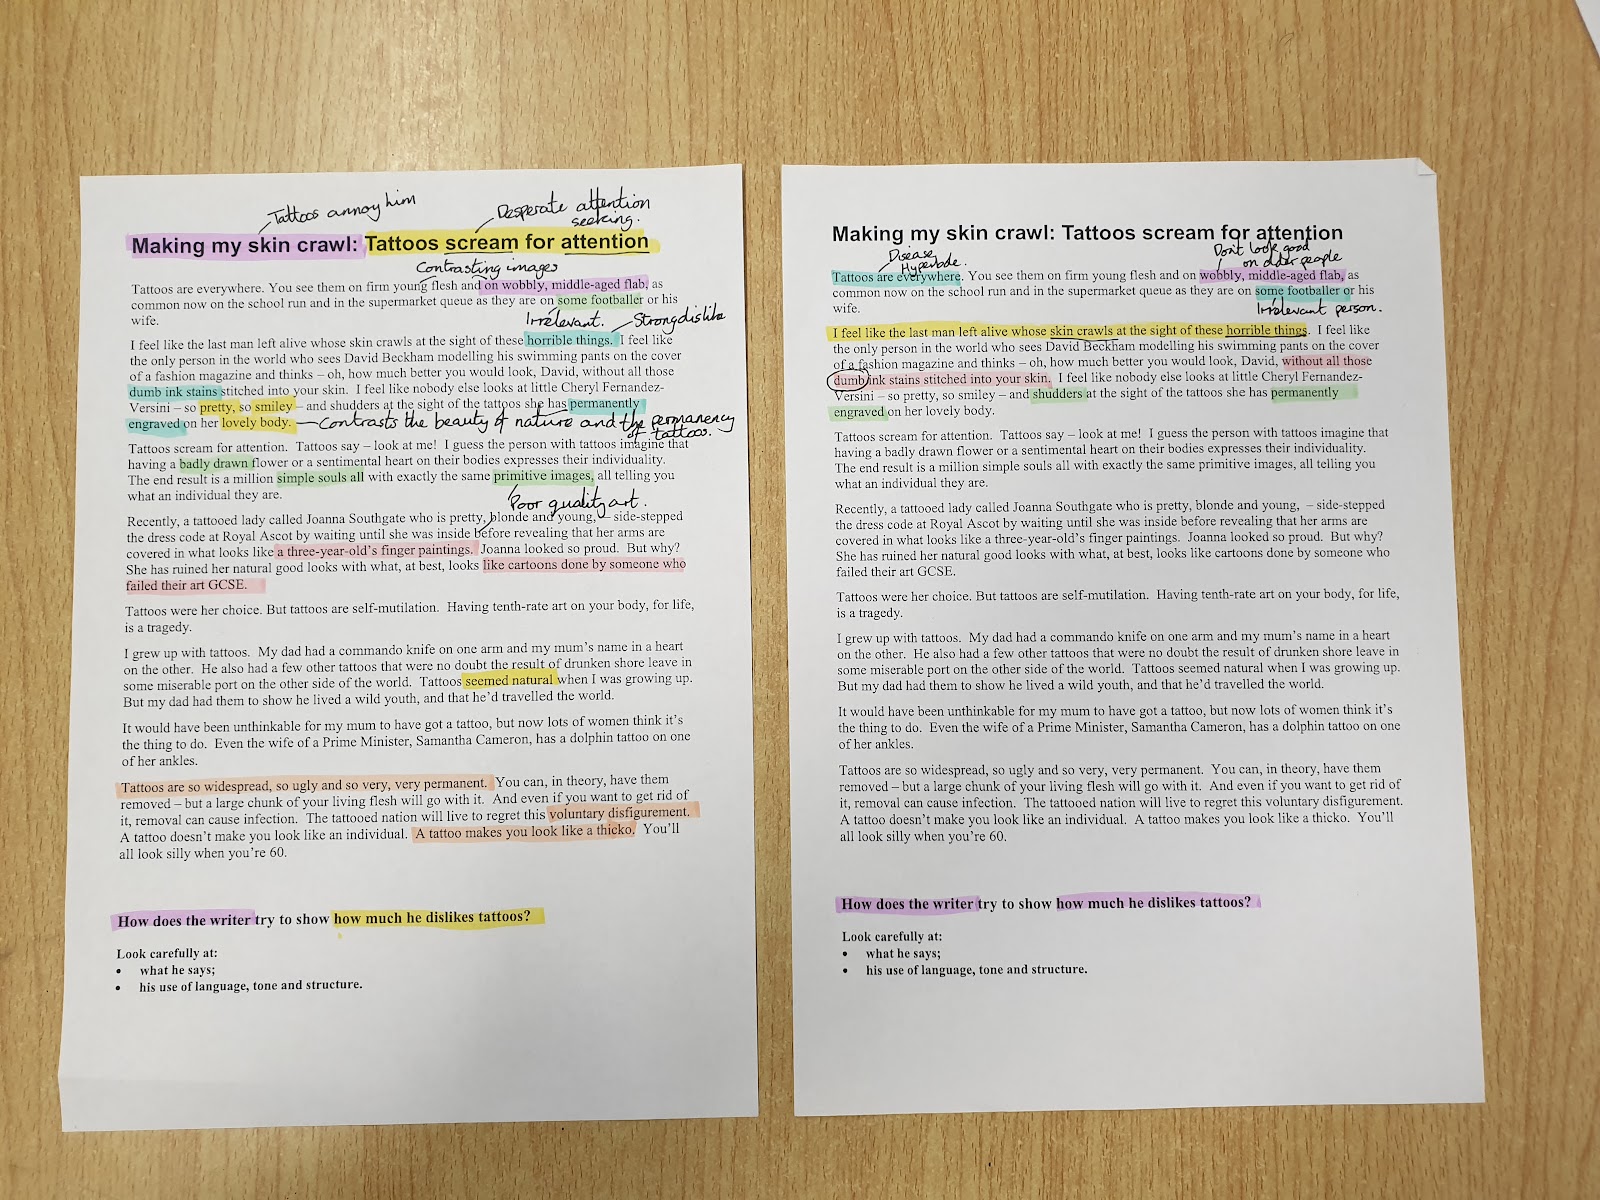
Let’s look at some examples. At the start of learning how to analyze an exam extract I will model a significant proportion of the annotation of it with heavy use of both feedback questioning and thought modelling.
Other times I might scaffold the opening section heavily before letting students practice the rest independently.
Ultimately I am looking to support with minimal scaffolding, however I only strip a layer of support away when 80% of the group are ready for it. Here are two examples of groups taught the same thing on the same day but at different stages of scaffolding removal.
Success Criteria Marking
Prior to any independent practice, I explicitly share the success criteria for the task. I refer to it often during the modelling stages and have it as the primary focus for my Live Marking comments during the practice. When we complete a practice task, I aim to finish with some “Catch It and Fix It” time where students are given an opportunity to self edit their work catching any errors they can (either self or peer check depending on the task). The visualiser is a great way to both model this process with students and to share best practice examples before discussing why/how they meet the success criteria. (More on this in a future blog)
Some Overlooked Gems
The visualiser device is essentially a desk mounted camera and as such is capable of taking actual pictures. Using it to grab a quick scan of a student’s work is a great way to build an evidence portfolio for things like exam access arrangements, SEN referrals or just sharing what is going well/not so well with colleagues and parents. It is also a super easy way to capture best practice whilst marking books to share with the whole group via whole class feedback (Again look out for more on this in a future blog).
Most modern visualisers have a built in microphone which is brilliant for capturing voice typing. When students are completing a practice task, I have the success criteria displayed on my board but I always have spaces to add live feedback comments as well as a bank of spaces for spellings. If I find myself giving the same feedback more than once during Live Marking, I quickly add the comment to the Success Criteria bank by dictating it into the visualiser microphone. I do exactly the same with spellings. It cuts the time it takes me to write the comment onto the board significantly and serves as a great, organically generated “Catch It and Fix It” task at the end of the lesson.
The Bottom Line
I wince when I think of the hundreds (thousands maybe) of hours I have spent creating PowerPoints to take students through topics over the years. In actual fact, all I needed to do was to teach. I mean actually demonstrate how to do things and how my thought processes work whilst doing them. I was never any good at “guiding from the side” anyway and now that I have mastered my visualiser I’ll never lurk at the side of a classroom again. You’ll find me front and slightly off centre… teaching.

[…] but many schools frown on even the use of staff mobile phones so… what then? I wrote about how I use a visualiser in my classroom previously and several people messaged me to ask about the microphone. Most modern visualisers […]
LikeLike
Morning. Thank you for your blog. Can I ask which visualiser you use?
Kaye
LikeLike
[…] blogged previously about my use of visualiser in the assessment and feedback in my classroom so please check this blog out for more […]
LikeLike
[…] A detailed post about how Simon Baddeley uses his: https://simonbaddeley64.wordpress.com/2019/12/13/how-i-use-a-visualiser-in-my-classroom/ […]
LikeLike
[…] https://simonbaddeley64.wordpress.com/2019/12/13/how-i-use-a-visualiser-in-my-classroom/ […]
LikeLike
Thanks for sharing your tech and teaching tips in the time of covid.
https://mathsux.org/
LikeLike
[…] had been using Office Lens on my phone to scan my visualiser modelling at the end of each lesson and upload to Google Classroom for those that were at home isolating so […]
LikeLike
[…] that were fresh in the students mind as they practised the next task. It was probably as close to taking a student’s book under my visualiser as I could get in remote learning lessons. If, like me, you use your visualiser for sharing, […]
LikeLike
Reblogged this on Longsands LPD.
LikeLike
[…] it around and interacting with it as necessary to model what we expected them to do. I have blogged before about the power of a visualiser in the classroom and lockdown learning served to further cement that […]
LikeLike
[…] I have blogged before about positioning my visualiser and I cannot recommend strongly enough getting the visualiser off your desk and into a position where it can be used whilst standing. Mine is off to the left of the IWB as students look at it but most importantly, it is within arm’s length of the IWB. If I need to interact with something I don’t want to have to walk around the desk to my mouse and keyboard. I can simply reach out and touch the screen. I have my Slides controls in the bottom left of the screen so they are deliberately within reaching distance of my teaching position so I don’t have to keep reaching for the mouse or clicker to move things on. […]
LikeLike
[…] IT AT THE FRONT – Simon Baddeley has written a great blogpost about where a document camera should be positioned in a classroom. You will need to commit to […]
LikeLike